Working on the MP Paint Scheme
Finding the Inspiration to get started on the MP Paint Scheme.
Let’s paint a locomotive! Where do I start? What colors will work, what paints to use, how do I design and paint a MP Paint Scheme for a locomotive? There are so many questions one can have when working on coming up with a new paint scheme. I’m sure it’s the same for the folks that do this for a real job.
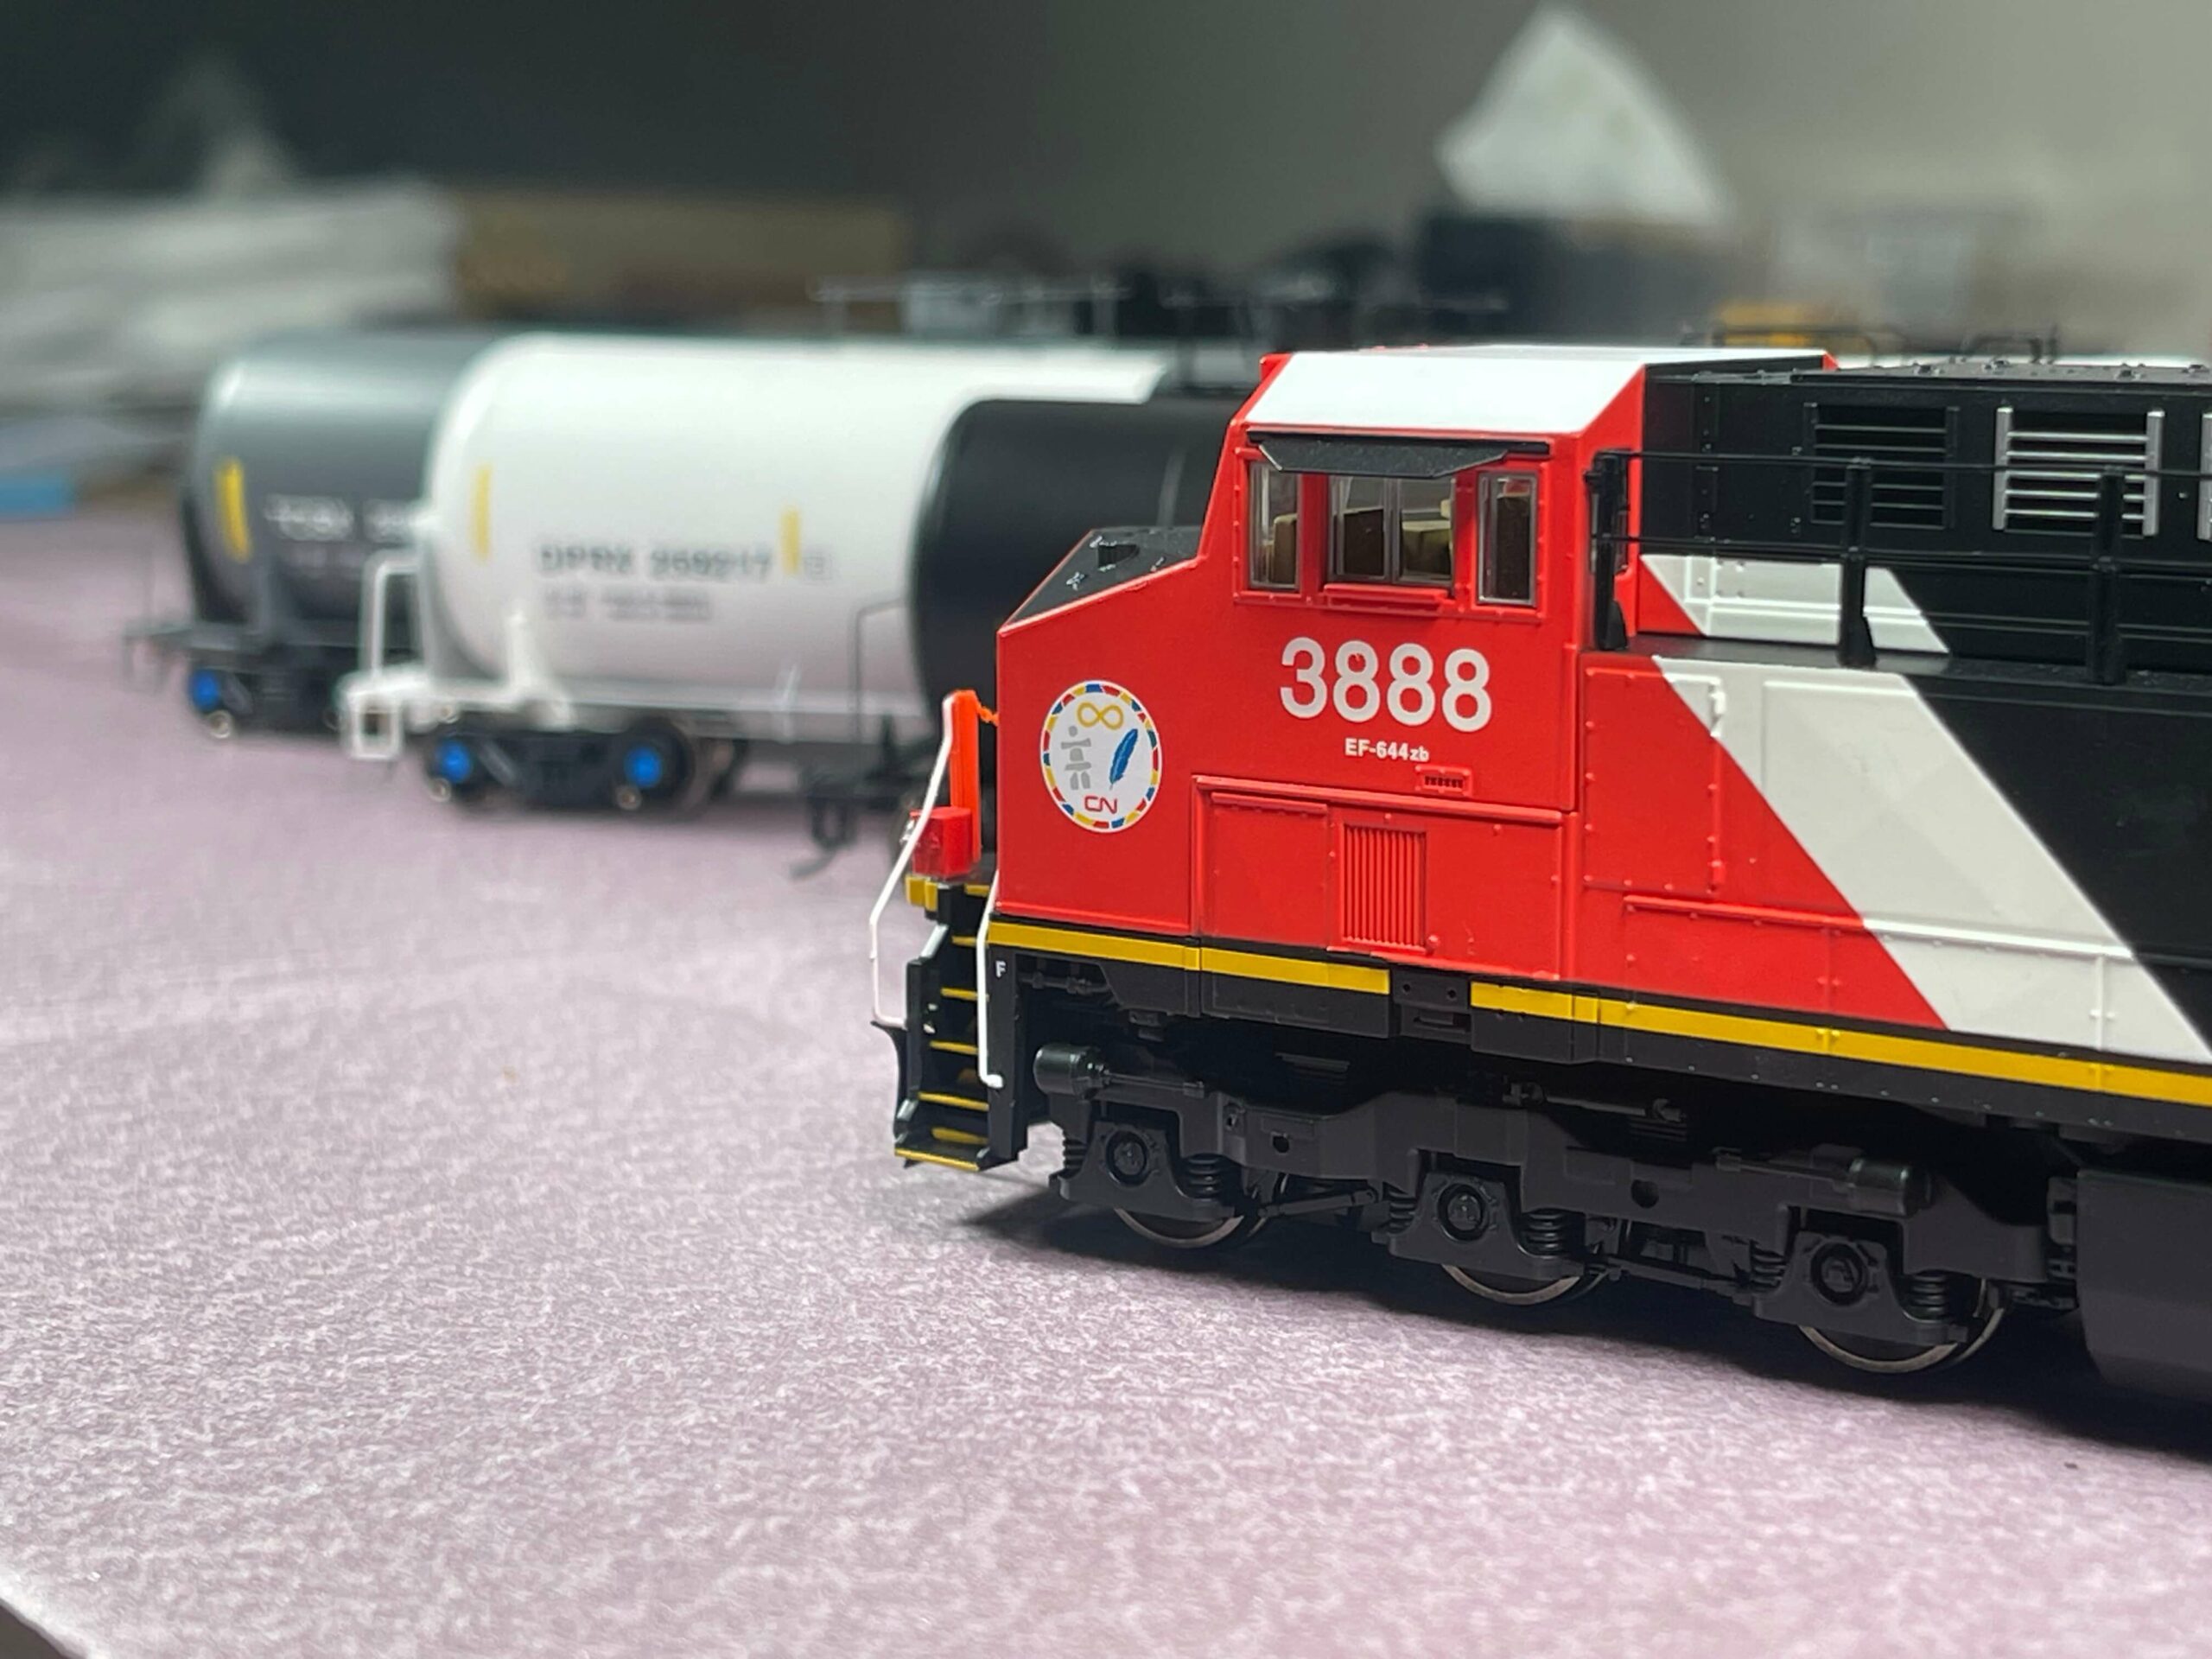
On the MP Railroad, I’m one person doing all of this, with the help, of course, from my wife if I can weasel my way into getting her to help. For this paint scheme, I wanted it to be somewhat in your face. Something that stands out but also makes sense as a modern-day Class 1 or Class 2 railroad. I took a bunch of inspiration from CN, Montana Rail Link, Vermont Rail Link, BNSF and others.
The inspiration really starts to set in when you finally have some time to just sit down and knock some things out. After many YouTube videos and looking at tons of pictures, I got burnt out trying to figure out what I wanted my trains to look like.


Getting Started on the MP Paint Scheme.
Sitting down and getting something done. Of course, I had to start with a name. Originally, C&C, C&I, C&K, M&T were all abbreviations of the railroad with one meaning or another.
Then, I started to think a little deeper and realized I wanted a railroad that would be more like a Class 1 or Class 2 with some more rail to run (one day if I were to have the space to build it). So, the MP and (Mississippi & Pennsylvania) railroad was born.
Now, I need a logo. So, I spent some time on the internet looking for a font I really liked, or thought would look nice but also had a modern feel to it. After finding the font I wanted to use, I made some modifications to the MP part of the logo. Look closely at the image below, and you will see where the change is made.
Now that the logo and the colors were chosen, it was time to start working on the design of what I wanted to paint the engines and any rolling stock I may own as a part of my railroad.

These may be a little more detailed than what I can do on an HO scale model, but it gives me a great base to start with. Plus, it’s a ton of fun to design something you think would be cool to see on your layout. Having an idea of what logos and markings I may need to send off to have created and done as waterslide decals is also a plus. I may print my own decals at home, but I feel as though to get the best quality, they will need to be professionally done (more on this later).
It all starts with the first engine you buy. You tend to draw some inspiration from your favorite locomotive or favorite rail line. Once you know that, you will find out the specific variations of engines you may enjoy to run on your layout and so forth.
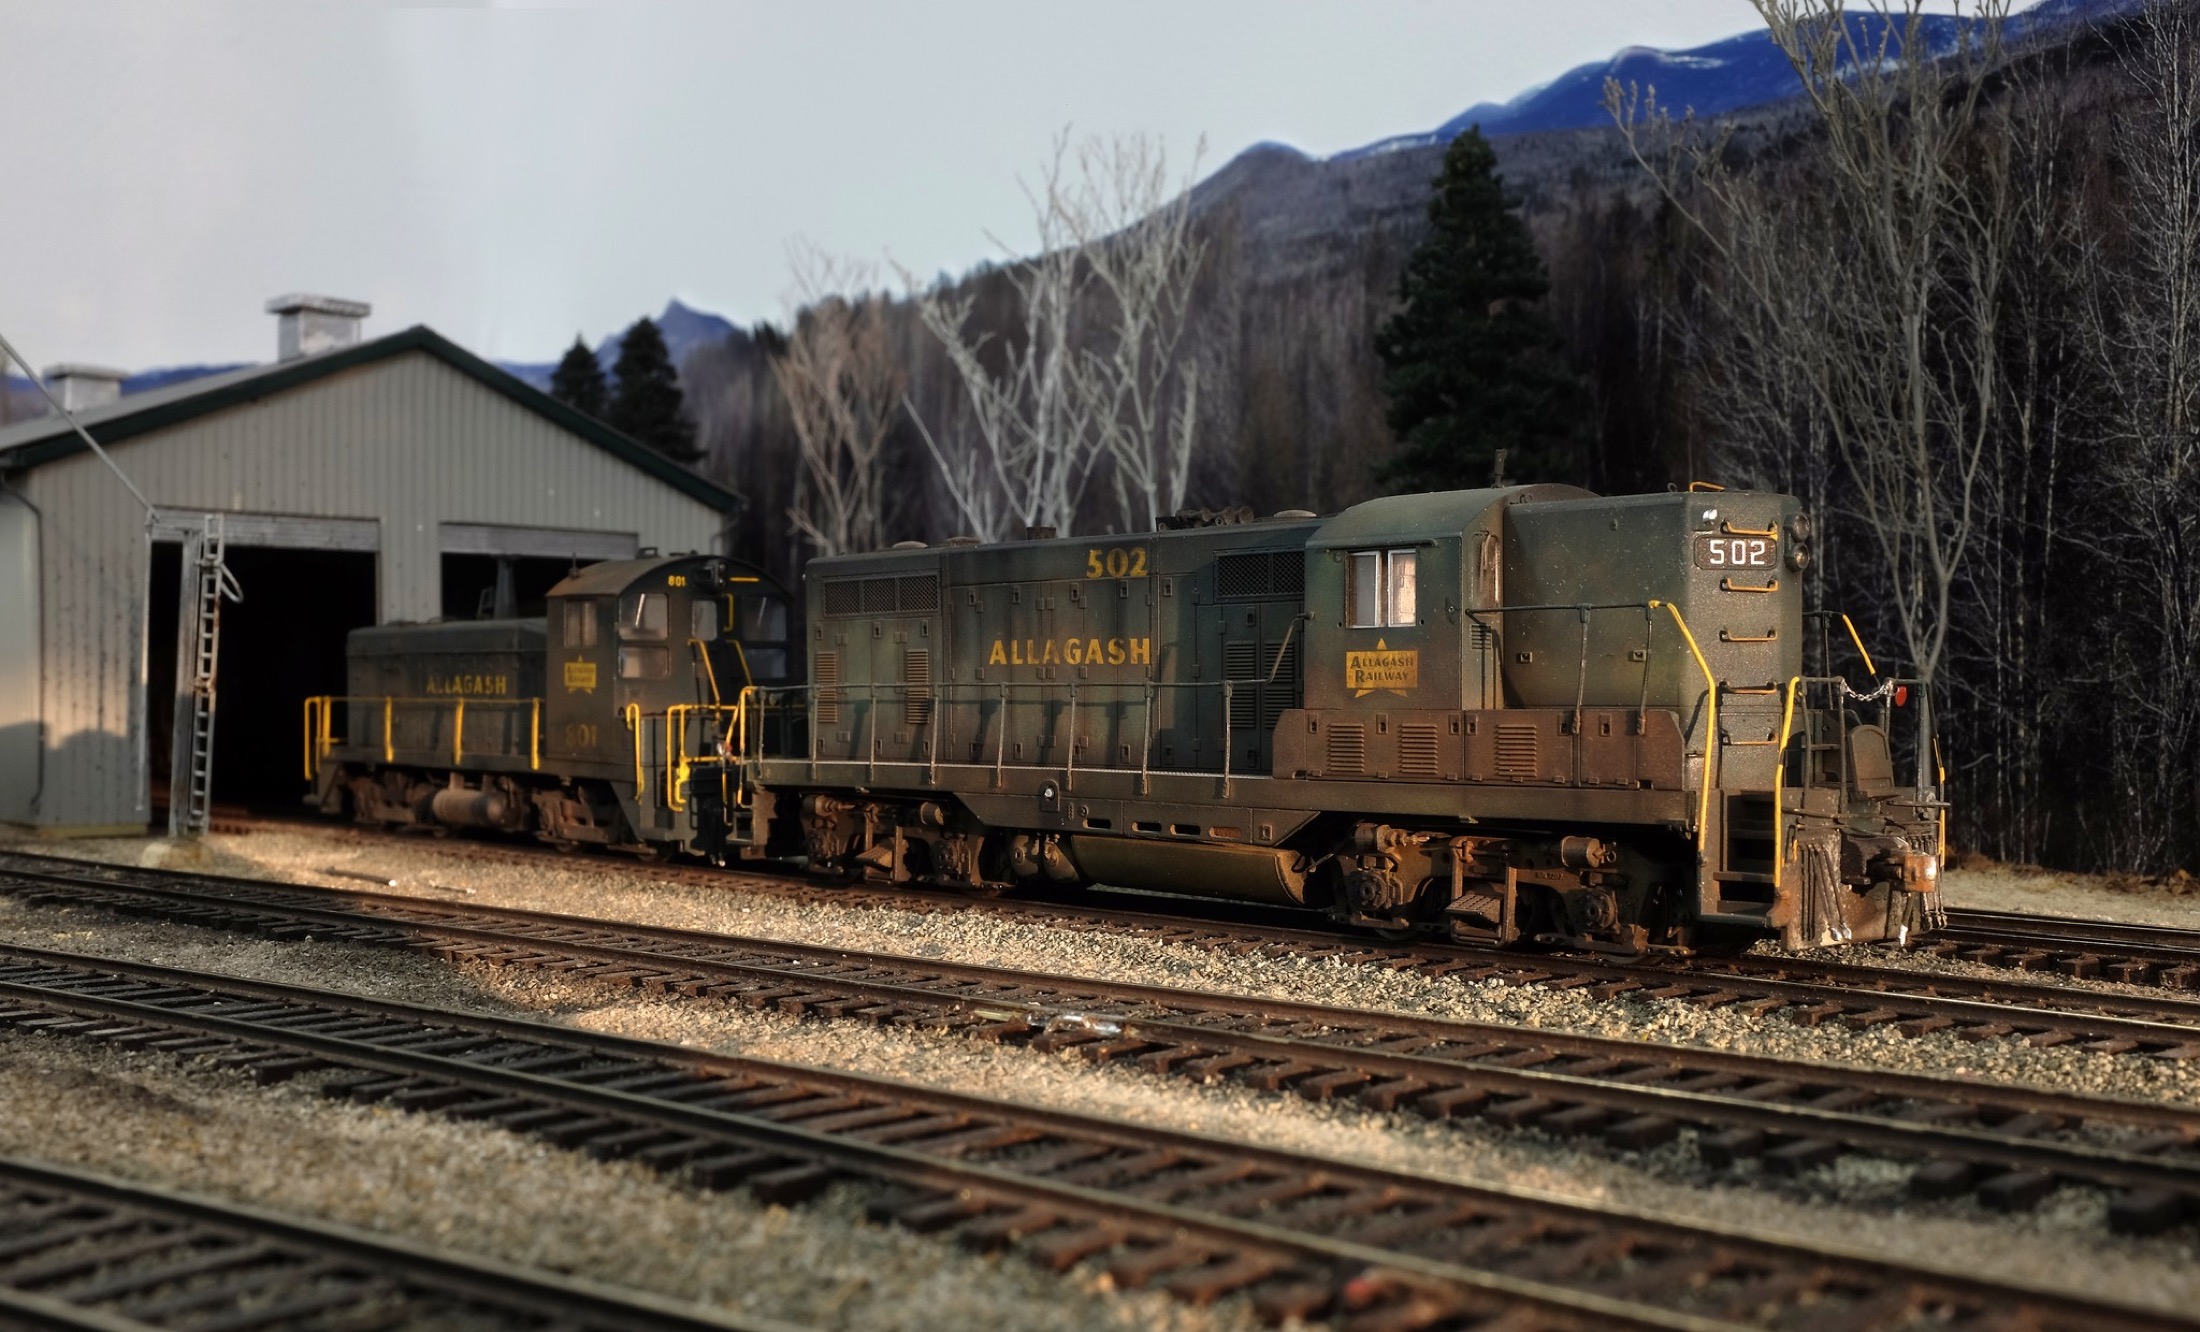
For the MP Paint Scheme and the Railroad, I wanted to get used or older engines that may need a little TLC (Tender Loving Care) to get them back to running status or hopefully ones that still run but just need to be painted with the new scheme for my railroad.
Moving on to the design itself. Once I have found inspiration from the above images or YouTube videos and other model Railroads etc., I’m able to start working on my designs.
But where do I start on my MP Paint Scheme? I’m not the best at drawing with pen and paper like some folks are. This is where we tap into the skills we have, and if you think you don’t have any, you will find out what you enjoy or can do the best in this hobby. I am good with Photoshop, Illustrator, and other Adobe programs. So let’s start with that.
Where can I find some great drawings that are professional-looking but already high quality enough where folks who enjoy model railroading or real railroads will know the shape or design of the engine? For me, it was easy when I randomly stumbled across the Trainiax website, and this is where I went into another rabbit hole of all the cool designs I could make for the MP Paint Scheme. Michael Eby, the creator of all the beautiful drawings of the engines, is from Quebec, Canada (A beautiful place itself; my wife and I spent our honeymoon in Quebec). Spending much time as a railfan like myself.
I was able to again draw inspiration from the models he has drawn. They are very detailed and look amazing. I typically use the 1:36 series drawings for all of my MP Paint Schemes, but if I can find the one I’m looking for with the 1:24 or 1:18 series, then that is what I will go with because they are much higher in quality. But mainly, I stick with the 1:36 series.
With that being said, let’s bring this into Photoshop and start our work!
Getting to work in your editor of choice mine is Photoshop.
Let’s get started on creating our design for me it’s working with the MP Paint Scheme, let’s bring the file into Photoshop. Once you load your design into Photoshop or any other image editing program, you should see something like this.

Let’s get started. The first thing I do is duplicate the background layer. You can drag the current layer onto the Plus icon in the box at the bottom of the layers panel, or you can right-click and click on duplicate layer to make a new one.
After that, we will want to separate the background blue (if it exists) and the white from the black lines. To do this in Photoshop, go to the menu at the top and click on “Select > Color Range” (I have my Fuzziness set to 90). Then, click on the blue background color using the eyedropper tool, for example, and click “Ok”.
You should see the train, tracks, and the area at the bottom turn black, with the blue turning white, just like the following image of the Color Range box.

When you have clicked the “Ok” box you will then see marching ants on your screen that are highlighting the blue area in your background. Click on the image below to blow it up, you will see black and white lines not animated below, but they will be animated on your screen.

Once you see the marching ants you can hit CMD + X on a MAC or on Windows CTRL + X to cut the background. You will see a change, but don’t panic! That’s a good thing the blue background will now be gone. But what we can do is just click CMD + SHIFT + V on a MAC or on Windows CTRL + SHIFT + V to paste the blue background in place again and this should put it right back where you cut it. You will see the blue again, it could be a little out of alignment as well. To fix this just click V on your keyboard to move the background back in place. If you hold in SHIFT while dragging the blue background up or down you can get it for stay in a straight line and help place it better.

You did it, great job! You have removed the sky, and placed it back into place. We can adjust the sky color later if we want or keep it the blue. This is your design so do what you want to do for your design. Now we are going to do the same thing for the white background color. Use your Color Range again like you did above but this time select the white layer and do the same as above. You will now have three layers. The white layer will be a little harder to line up so zoom in and take your time to get it lined up. Your photoshop should look like the image below.

So what we have done with the drawling is separated it into 3 different layers Layer 2 is the sky background color, layer 1 is the black lines or details lines and layer 2 is the White undercoat on the train engine.
We really want to keep the sky layer and the black lines at the top of the design file. And we will now start to paint the engine with our colors, logos, graphics and other items in between the white later and the lines. Let me show you an example. I’m going to color the engine a simple blue color, and the rails a brown color.
First thing I’m going to go is Group the top two layers. So select both of these layers by clicking on the top one and then hold down SHIFT on your keyboard and click the other layer.

Now I’m going to CMD + G on a MAC or CTRL + G on Windows to group this or add it to a folder and label it “Top Layers (DO NOT EDIT)” .
Now I’m going to use the Rectangular Marquee Tool “M” on the keyboard to select the entire train from the top of the tracks and up. Once I have done that I’m going to go back to the layers panel and click on the circle with the black and white in it. In that popup window I’m going to click on Solid Color.

We have created a group and also create a new Solid Color Fill layer. This way you can click on the blue next to the chain icon and change that color to anything! This will be your base layer, as you create new layers you will want to add the color fill layers above this one to ensure the colors will work on top of your base color like you can view in the image below. I will most likely work on a video to go over this in more detail! But for now this should get your started. Hope this helps to get your started with your own model railroad paint schemes.

The only thing that is next is to tweak and work your design until you have something that you are very happy with! Best thing is to send this to some friends or possibly add it to a facebook group if you are apart of one for the model train world. Its a great way to get some feedback on engines that are real world company’s like UP, CN, CP, BNSF, NS, CSX and others.
What is next once you have your design completed? Well you now need to get some graphics done, this is going to be most likely waterslide decals, but depends on the size of engine. If you are doing G scale then you may be able to use painters tape to take care of certain designs.
Where to get your decals.
Finally, one day I was able to just sit down and knock something out. These may be a little more detailed than what I can do in an HO scale model, but it gives me a great base to start with. Having an idea of what logos and markings I may need to send off to have created and done as waterslide decals. I may try this at home, but I feel as though to get the best quality, they will need to be professionally done.
Here is a small list of websites that will provide professional waterslide decals services (Message me if you know of others, I would love to provide a great list here):
- Highball Graphics – Will do custom designs
- Precision Design Co– Will do custom designs
- Circus City Decals – Will do custom designs
- Smokebox Graphics – Sells Safety striping FRA 224 Striping and other items
If you want to try to make your own waterslide decals, then you can get almost all of the supplies online. But this may not provide the quality you are wanting if you are trying to get that ultra high quality print.
So as you can tell there is still a ton of work that needs to be done, but we are moving along with the paint schemes we are wanting to use for the MP Paint Schemes. Hope to have some more designs soon! As well a more in depth video on how I go about setting up and designing my MP Paint Schemes for my engines and rolling stock.
Final Images with Before and After MP Paint Scheme.